Roland-designs , Virginie's blog.

"Never lose an opportunity of seeing anything beautiful, for beauty is God's handwriting." - Ralph Waldo Emerson

Showing posts with label Easter. Show all posts

Thursday, 19 April 2018

Rabbits - Cross stitch pattern


I'm really happy to present you with my latest reproduction of an antique Berlin woolwork pattern. This duo of cute little bunny rabbits are re-charted from a German hand painted pattern signed Hertz and Wegener in Berlin.

While many associate bunnies, and Easter this  chart can also be stitched and framed as a wall hanging for a pet owner, farmer, a nursery, kindergarden or school.

Design Area: 83 x 72 stitches

If stitched on 28 ct linen/ 14 ct aida the pattern will measure :

5,79" x 5" / 15 x 13 cm

Pattern available here: ETSY, Makerist, Website


Hertz and Wegener in Berlin

Monday, 19 March 2018

Super easy crochet Easter eggs - Free pattern

Easy crochet egg cover

This super easy crochet egg pattern is a simplified version of Priscilla Hewitt's Victorian egg ornament.

I whipped up 4 of them this sunday. It was cold ( -11 degrees ) in the morning, the sun was shining and it was a perfect day for doing a little craft project while listening to English traditional folk songs.

Materials

DMC cebelia size 20.
1.50 crochet hook
Embroidery needle
Sharp scissor
Ribbon of your choice
Egg ( real egg, or plastic )

Instructions

- ch 4, join with a sl st to form ring.
- ch 3 ( this counts as your first dc ), then work 11 dc in the ring. Join to first dc with a sl st at the top of the first 3 ch.
- ch 4, attach  to the top of the fist dc, then (ch 3 and attach to next dc -do this x 10 more times). You now have 12 loops.
- ch 5, attach with sc into first loop, then (ch 4 and attach to next dc - do this x 10 more times). You now have 12 loops, and from now on you will stitch in the round so I suggest placing a stitch marker to help you remember when a new round starts.
- ch 5, attach with a sc into next loop, continue in the rounds about 9 times for a regular egg. If you have a larger, small egg this is the time when you can adjust the size by adding or removing rows. 
- ch 4, attach with sc into next loop - do this a total of x 12 times.
- ch 3, attach with sc into next loop - do this a total of x 12 times.
- End your crochet here by cutting a long tail, and passing it through the last crochet sc.
- Gently put your egg into your crochet work, weave the long tail into the top 12 loops, tighten and knot. 
- If you want to add a loop for hanging just make a chain with the extra thread. In the photos you can see the loop I made with with ch 40.
- Weave in all ends, and add a ribbon if you like.


A little stich marker helps to keep track of how many rounds you've made

Testing to see how many rounds I need to cover my little plastic eggs.

Saturday, 4 April 2015

Easter 2015, Super easy crochet dish cloth pattern

    Like many crafters I have a stash of supplies that  were bought on impulse, usually due to a sale sign over a basket of brightly colored yarn.

     Once in a while I itch for a quick, easy, non long-term-commitment  project.

      In my knitting box, I had two balls of cotton/linen yarn that had sat there for too many years. The colors were a little dull, but since it was cotton yarn I thought some little crochet rags would be just the thing to put them to use.


Super easy crochet dish cloth ( 23 x 23 cm )

Cotton yarn  (19 sts and 28 rows to 10 cm )

Crochet hook 3.5

Instruction:

-Start by making a 40 sc chain.
-Work 17 rows in  treble crochet.
-Use a different ( or the same color ) to work a little border in sc, with 5 sc in each corner.
-Weave in ends with a large embroidery needle.

Super easy crochet dish cloth

........................... Easter 2015 .........................

Easter started with a blanket of new snow........


Rosaline painting Easter eggs while wearing her 'Snow white' costume.

Crochet Easter eggs..... I made these years ago and my husband had carefully saved them....
 Patterns here:

http://www.grannys-garret.com/pattern/nuncia_easter_egg.pdf

http://priscillascrochet.net/free%20patterns/Easter/Art%20Deco%20Easter%20Eggs.pdf


Princess Emilie posing by the crocuses
'' Isn't it a little early to be putting flowers out ? ''  Well, pansies can take a few degrees minus, so they are the first flowers I plant out........

................................................................................


Cute little book cover made by my sister Elodie
She even embroidered my name.... it fits my agenda perfectly ! Thank you !

Saturday, 5 April 2014

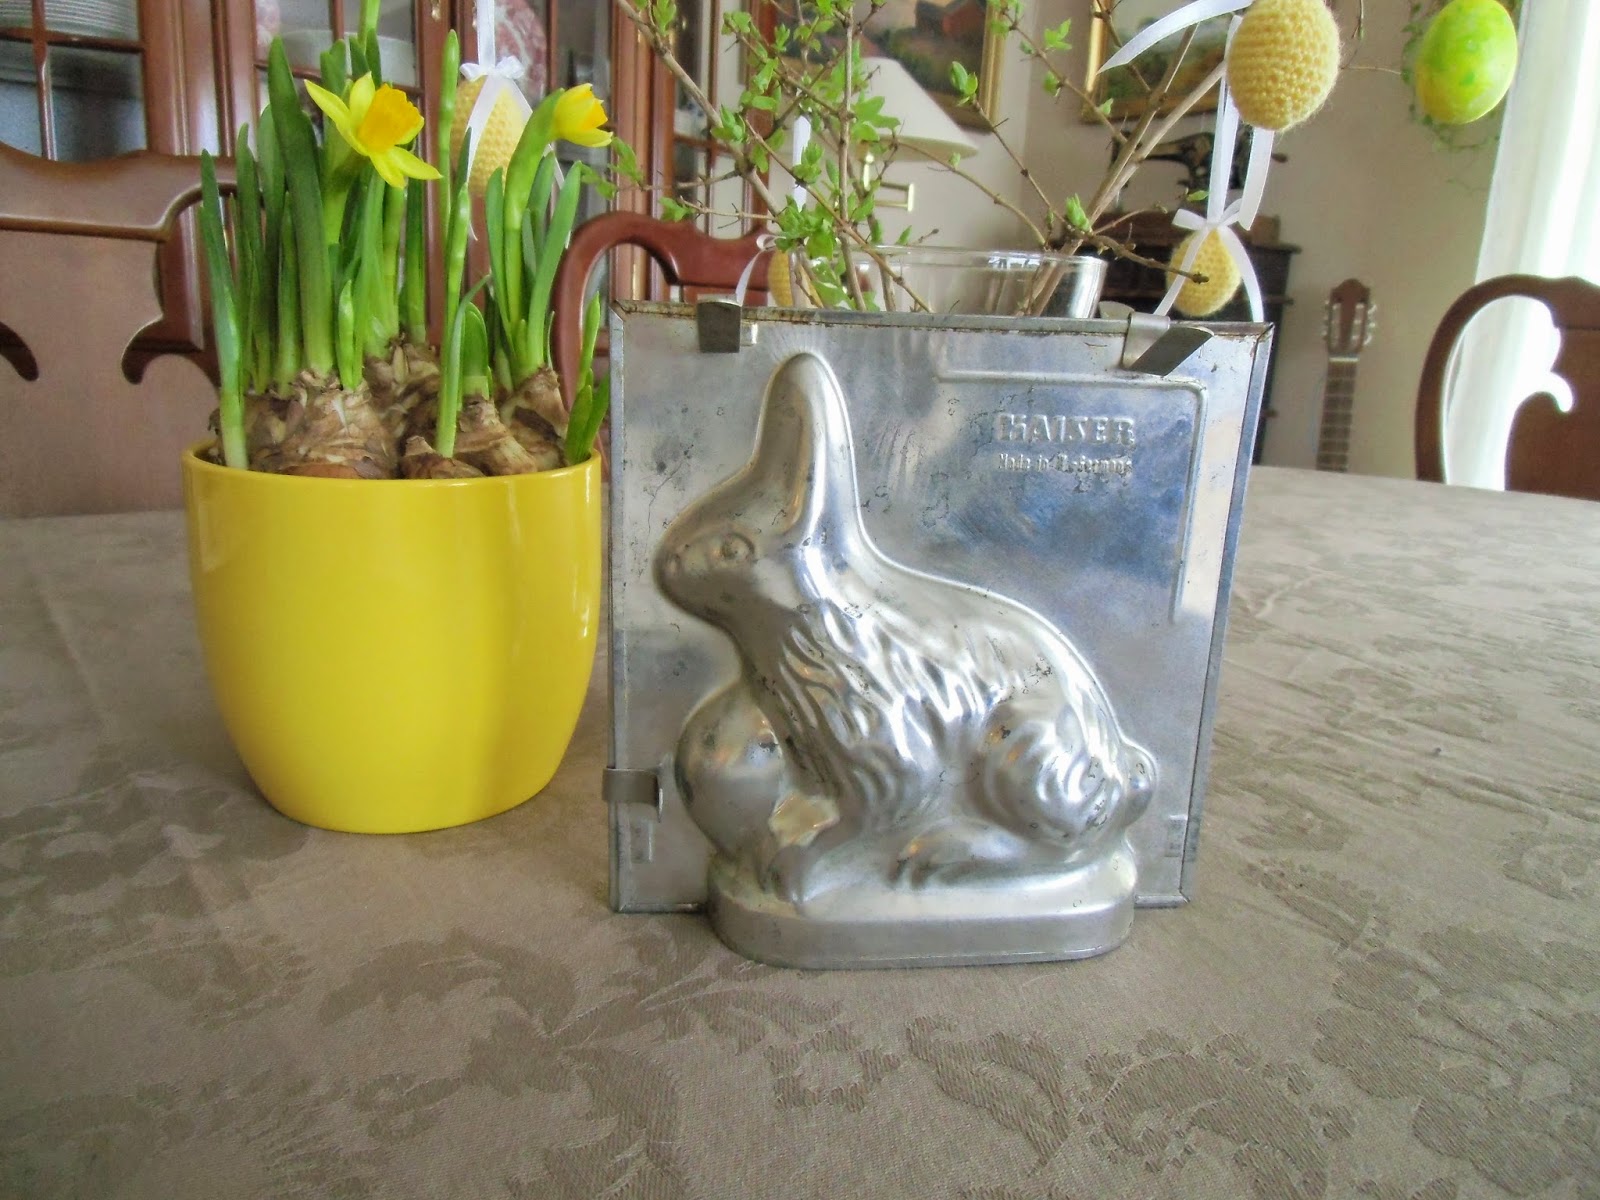
Vintage Easter mold.

    When I was in Berlin last month for the team captain summit I passed by a vintage/antique shop and found this little Easter mold.

    It is marked ' KAISER, Made in W Germany'

    Aluminium, two halves, with three metal 'pegs' to close the mold ( I think one peg is missing ), large opening at the bottom.

    I'll probably use it to shape some marzipan, or chocolate.

    Any ideas of how to use it ?

    Have you ever used a mold like that before ?

Vintage West Germany Easter mold


Friday, 28 March 2014

Crochet Easter eggs, spring and a little progress.....


     Spring is here, and this year it came a little earlier than usual for Norway. But we shan't complain, the winter is over and the spring bulbs are growing. Every spring I tip-top around the garden checking all the places where I hid bulbs the autumn before, hoping to see little green shoots....


IN THE BREAST OF A BULB
IS THE PROMISE OF SPRING;
IN THE LITTLE BLUE EGG
IS A BIRD THAT WILL SING;
IN THE SOUL OF A SEED
IS THE HOPE OF THE SOD;
IN THE HEART OF A CHILD
IS THE KINGDOM OF GOD.

                                                        WILLIAM L. STIDGER 


The first flowers of the year, some yellow crocuses.

    With Easter around the corner, I wanted to do a simple project, something that could use up some of my leftover yarn. I started by knitting a little Easter egg, but I felt it just looked  somewhat ' odd', so I decided to try some amigurumi eggs instead - crochet being so much more versatile for 3d objects.

    So here are my Easter eggs, they were so simple and took only about 10 minutes to crochet, and 5 more minutes to attach the ribbon and tuck in the threads.

   For those who are interested the pattern I used is here :  http://thecraftfrog.com/2010/06/28/eggs/


Amigurumi Easter eggs

A few twigs from the garden


   For those who love cross stitch, here is a photo of the progress made on ' Berlin posy'. I was missing some of the colors, and had to order threads so it is taking a little longer than planned to finish.

Berlin posy